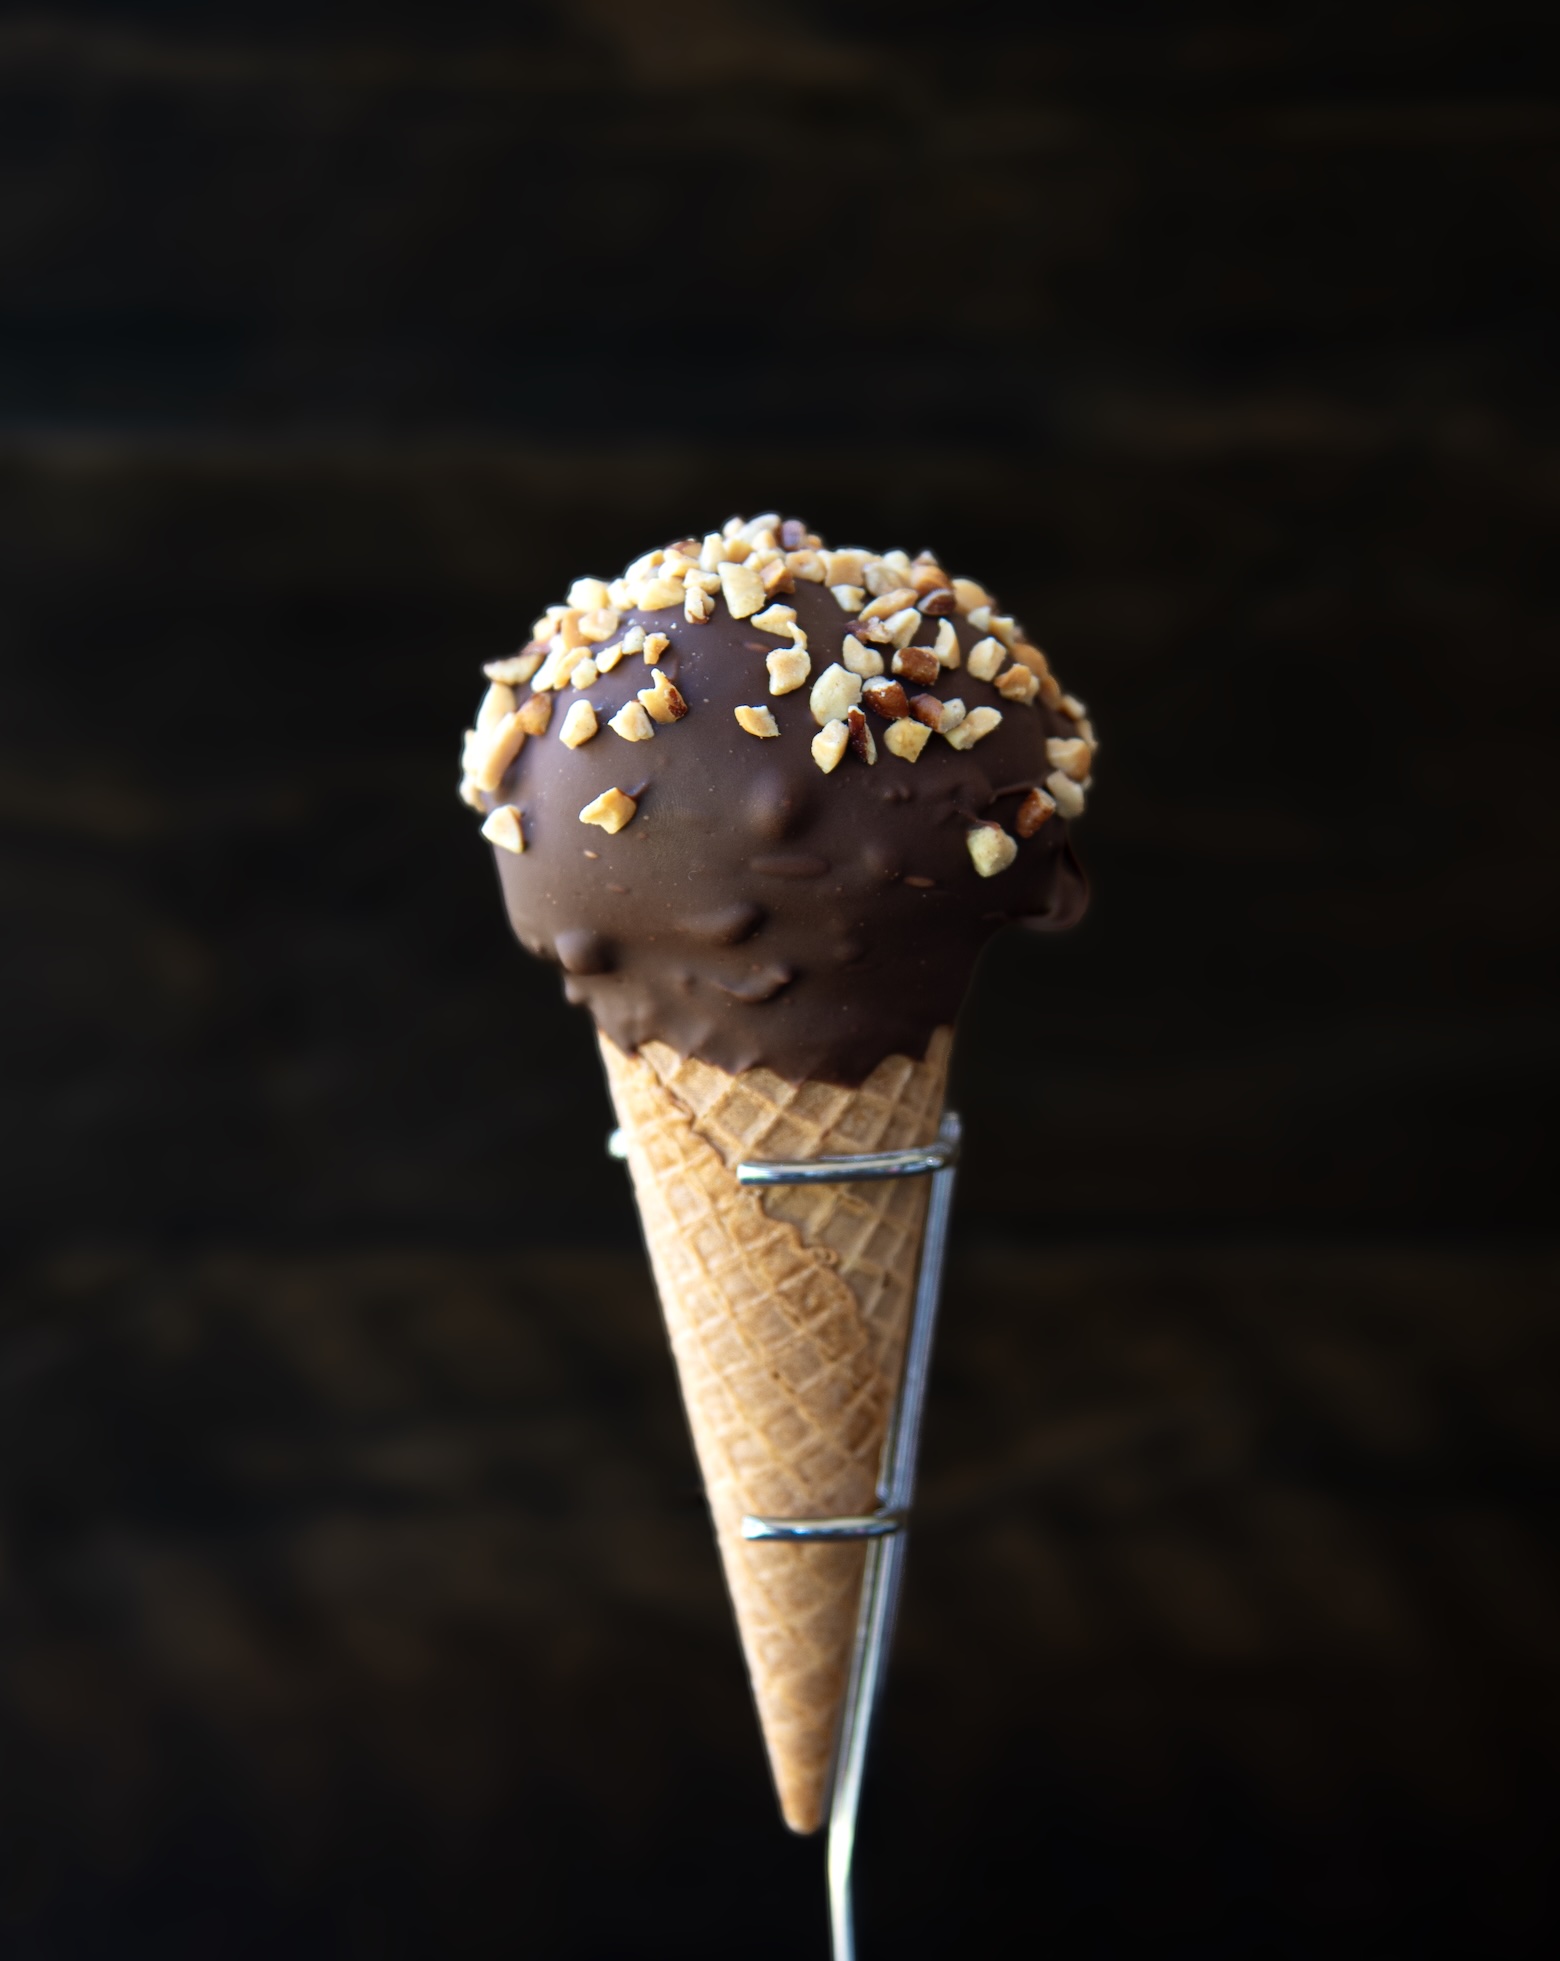
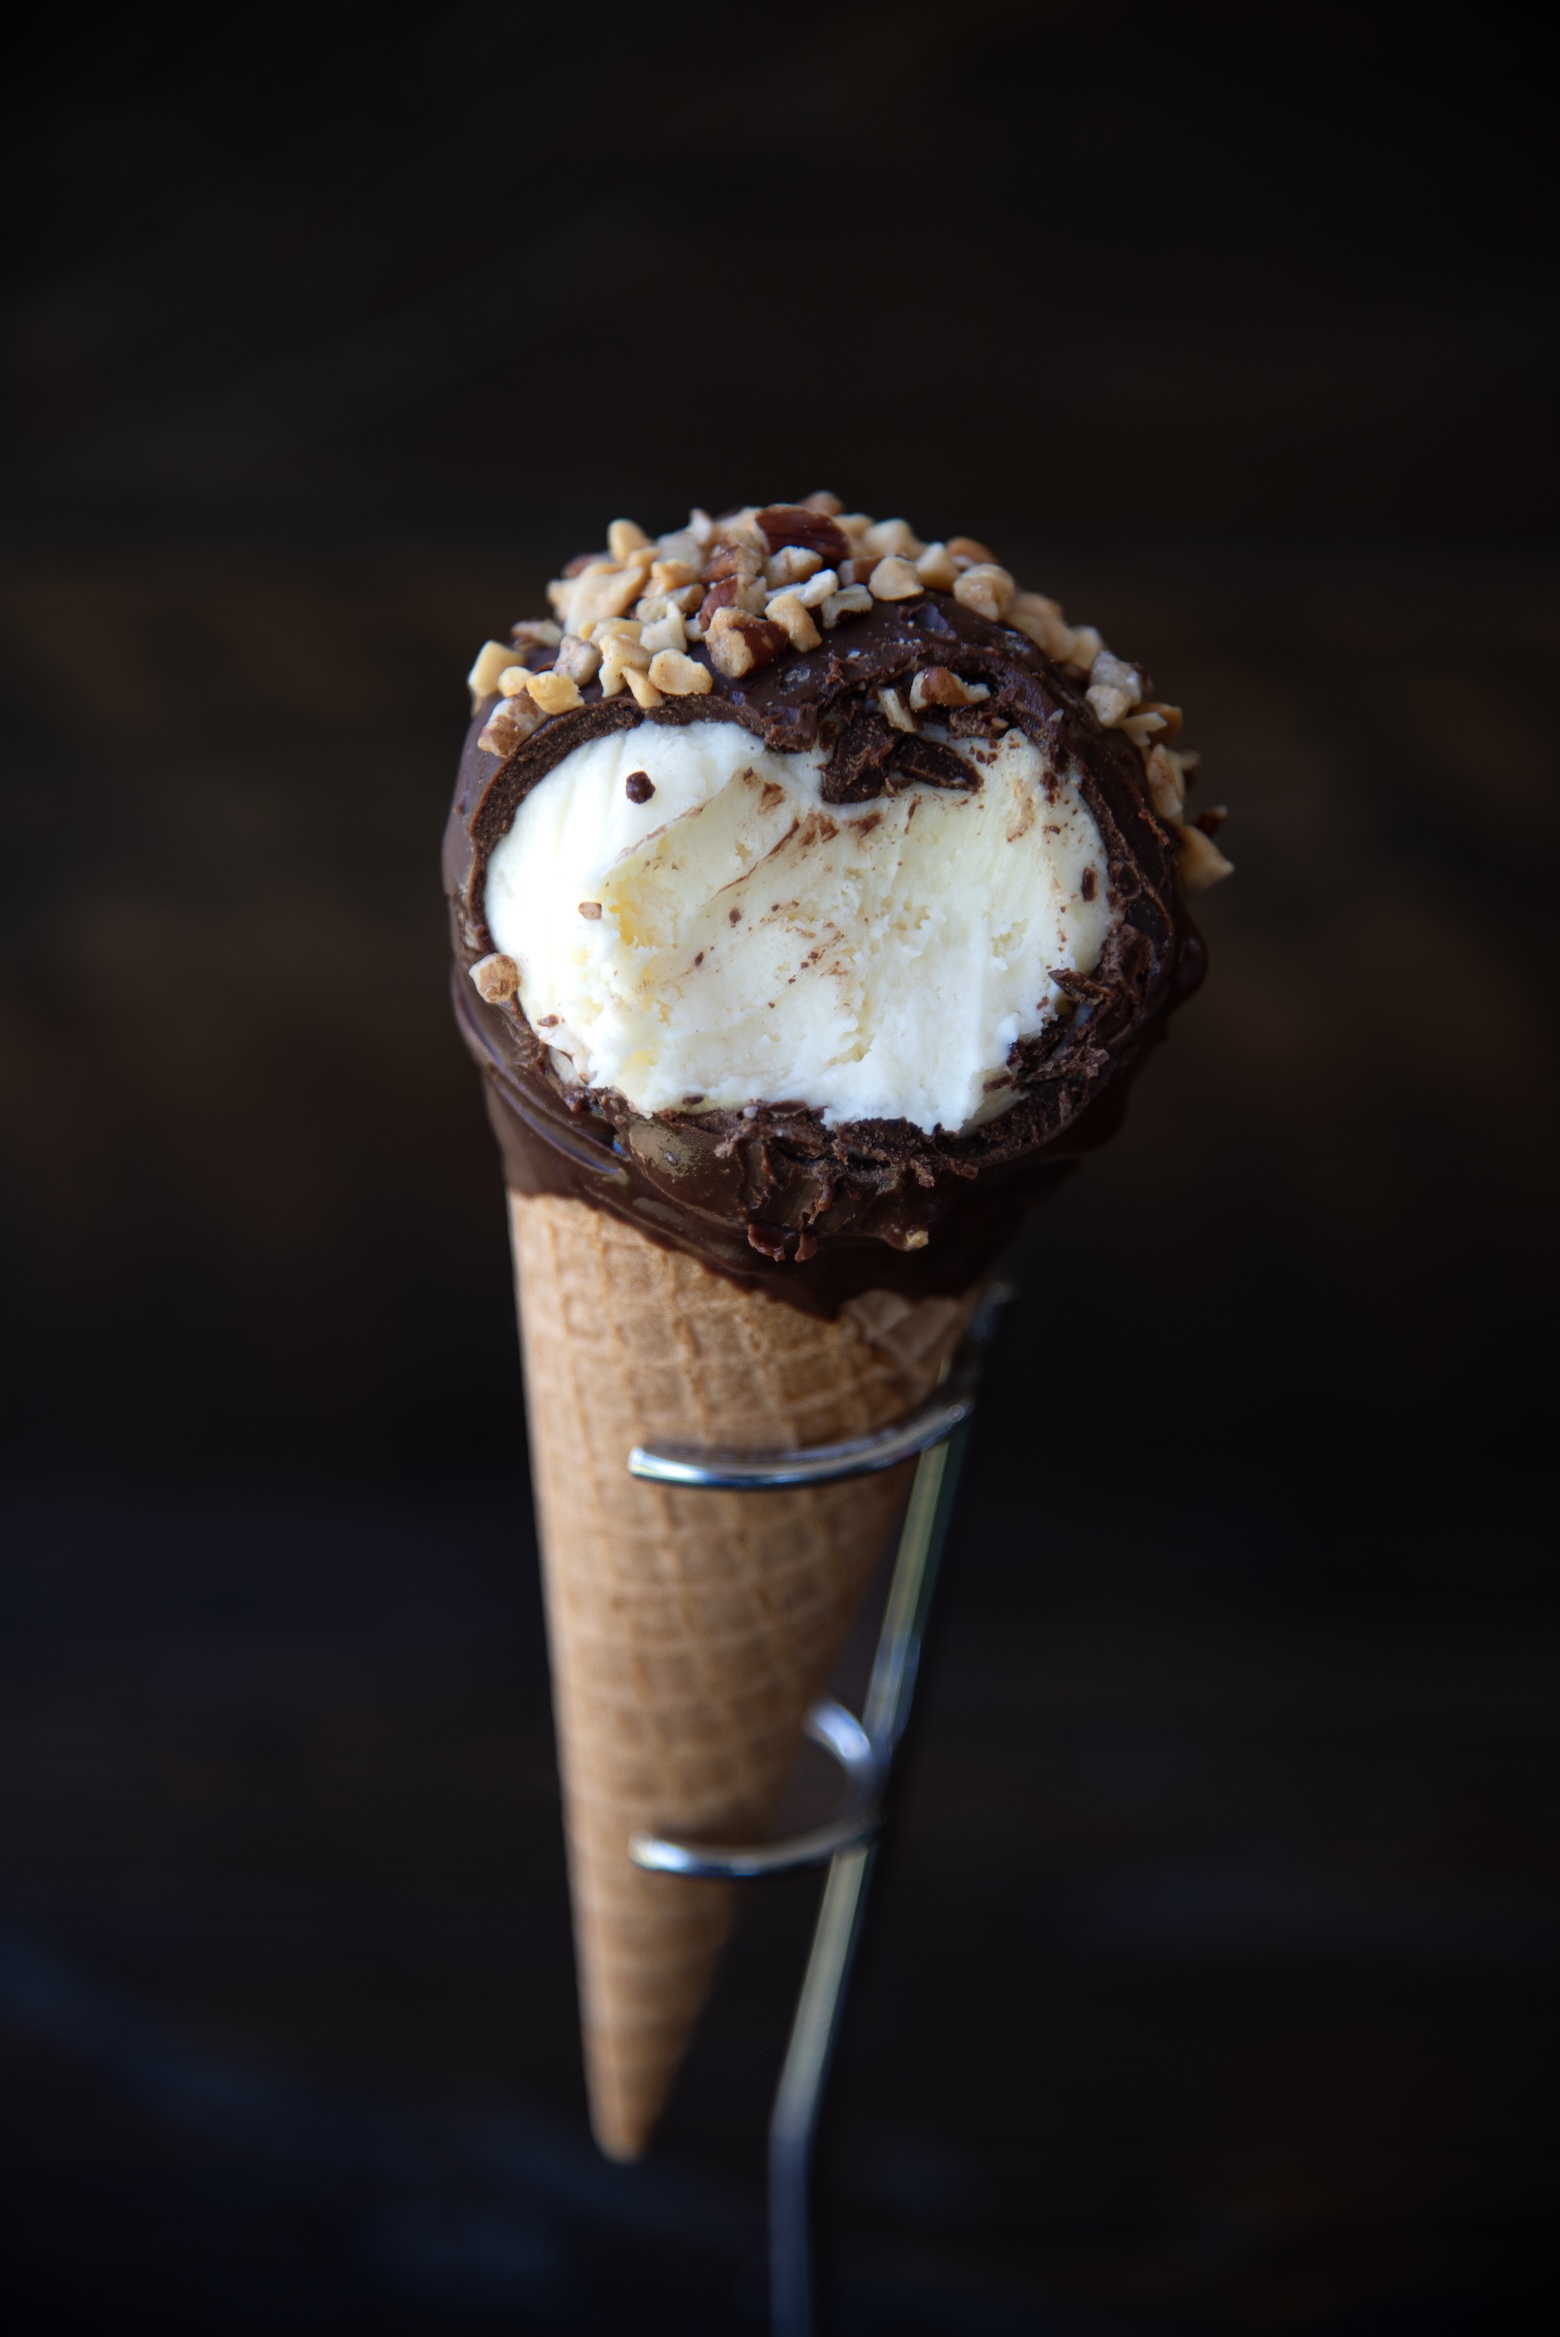
This Drumstick Cheesecake Cheeseball has a vanilla cheesecake center, coated in chocolate and peanuts, all in a sugar cone.
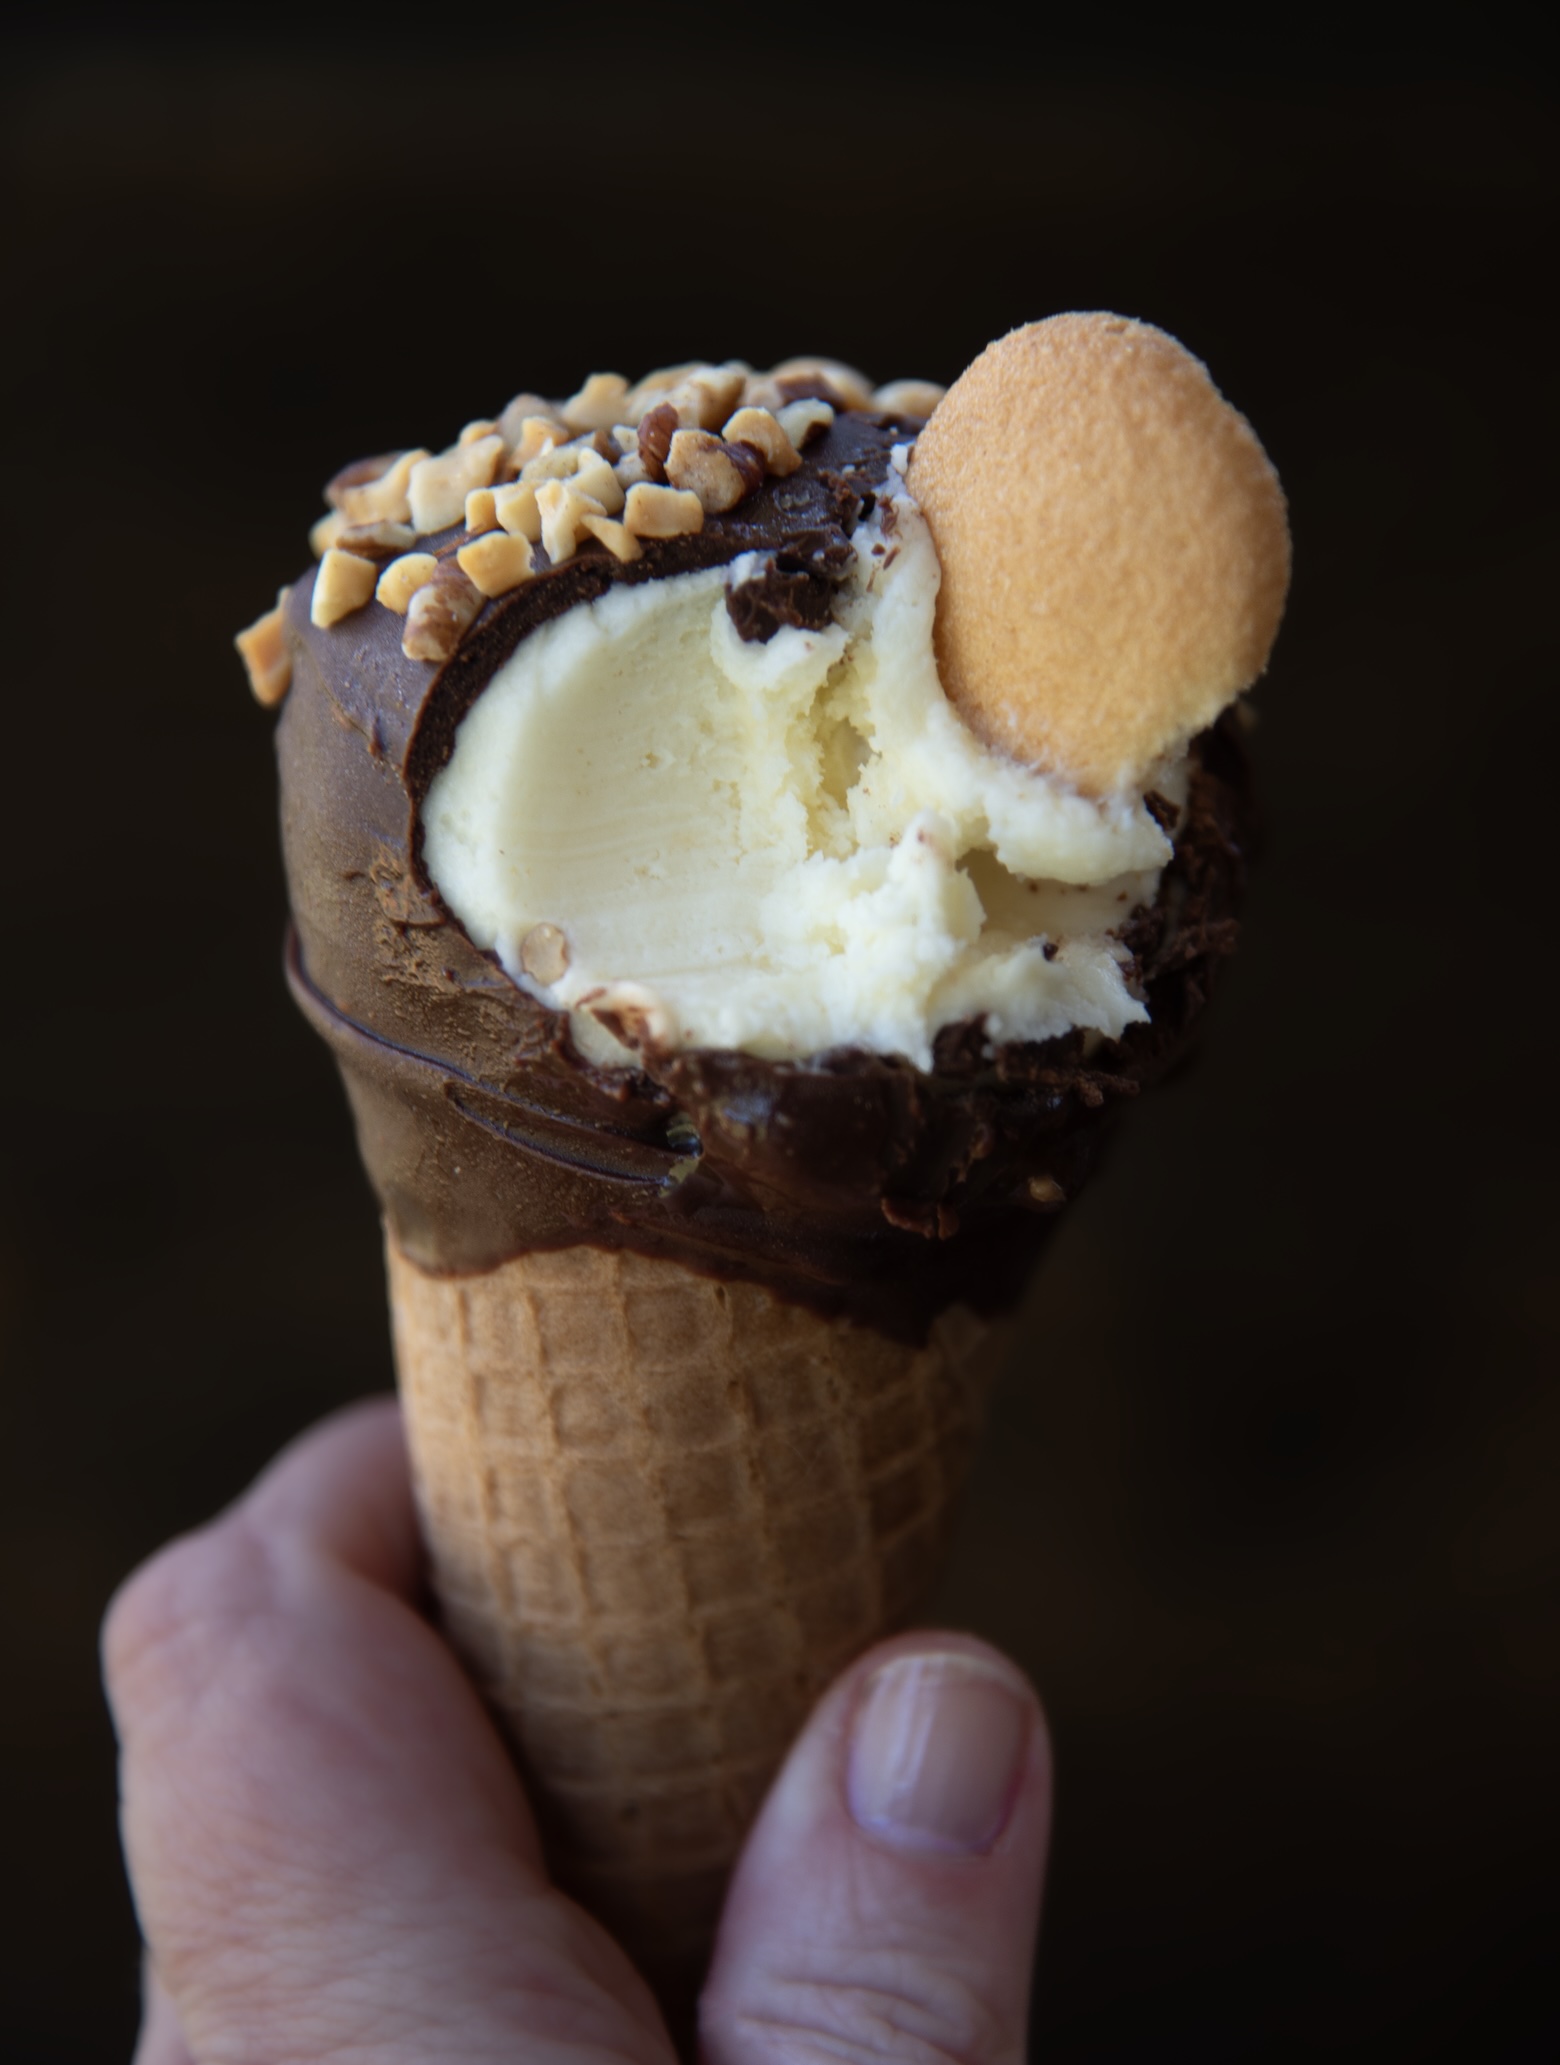
While it may look like ice cream, it is in fact a cheeseball.
A Drumstick Cheesecake Cheeseball….made to look like the ice cream.
Almost every time I participate in Summer Dessert Week I include a recipe that involves Drumstick Ice Cream Cones because I love them so.
And if you are a long time reader you know that I make cheesecake cheeseballs often.
I have even made a Drumstick in cheesecake form before….just as cups. I’ve also made fudge, crumb cake, babka, pudding shots, and ice cream terrine.
While these were intended to be a cheeseball, they are small enough that they could just be your own personal cheesecake…which is what my husband did. 🙂
Ingredient Highlights:
Cream Cheese: Use full fat cream cheese for this recipe. Save that low fat stuff for…well, no one. Even my dogs won’t eat reduced fat cream cheese….so that should tell you it’s gross.
Unsalted Butter: If you really want salted butter you can but for this cheeseball I chose unsalted butter.
Vanilla Extract: I always use Rodelle vanilla. They are by far my favorite vanilla.
Dream Whip: is a powdered whipped topping mix made by Kraft. It’s used as a convenient substitute for whipped cream in many desserts. While it may seem like something odd to add to this, it helps give it the vanilla flavor similar to the ice cream in Drumsticks. I buy mine at Walmart.
Chocolate Chips: I used semi-sweet because the cheesecake is sweet but you can use milk chocolate if you prefer. I like to use the mini chips because they melt quicker.
Vegetable Oil: You can use butter or shortening as well. But you need to add it to the chocolate to get the right dipping consistency. If you use butter or shortening you will get a thicker consistency.
Peanuts: I used salted peanut pieces for mine but you can use unsalted. I just like the salty sweet combo.
Sugar Cones: The Drumstick ice cream cones use sugar cones so that is what I went with. You can use crushed waffle cones as well.
Drumstick Cheesecake Cheeseball: A No-Bake Dessert Dream Come True
If you love the nostalgic crunch of a chocolate-dipped Drumstick ice cream cone, get ready to fall head over heels for these Drumstick Cheesecake Cheeseball. This whimsical treat combines the rich creaminess of cheesecake with the crunch and charm of a chocolate coated cone…no ice cream maker (or melting mess!) required.
The Magic Starts with Creamy Cheesecake:
To build the base of these indulgent cheeseballs, you’ll start by beating together softened cream cheese and butter in a stand mixer fitted with a paddle attachment. This forms the rich, creamy foundation of your dessert.
Next comes the sweetness—add in powdered sugar and a touch of vanilla extract for that classic cheesecake flavor. To give these cheesecake balls their vanilla ice cream flavor, mix in a packet of Dream Whip.
Once your mixture is smooth and dreamy, use an ice cream scoop to portion out four mounds onto individual pieces of plastic wrap. Shape each mound into a rough ball, then wrap tightly with two layers of plastic wrap to help them hold their shape. Pop them in the freezer for about four hours until they’re nice and firm, about four hours.
Time for the Chocolate Coating:
While your cheesecake balls are freezing, prepare the decadent chocolate coating. In a heat-proof bowl set over a saucepan of simmering water, melt semisweet or milk chocolate chips with vegetable oil until the mixture is silky and smooth. Let it cool for about 5–10 minutes as the hot chocolate will melt your frozen cheesecake centers.
Once cooled, it’s time to assemble!
Unwrap the frozen cheesecake balls and set out four small drinking glasses to hold the cones upright. Dip the rim of a sugar cone into the chocolate and press it firmly onto the top of a cheesecake ball . If it doesn’t stick right away, dip again and place it in the freezer for five minutes to help set.
The Finish:
Carefully dunk the entire cheeseball into the melted chocolate, coating it completely. Quickly sprinkle with chopped peanuts before the chocolate hardens.
Once dipped and decorated, these Drumstick inspired delights can be stored in the refrigerator until you’re ready to serve. They’re best enjoyed the same day for the ultimate contrast between creamy center and crisp shell.
To Serve:
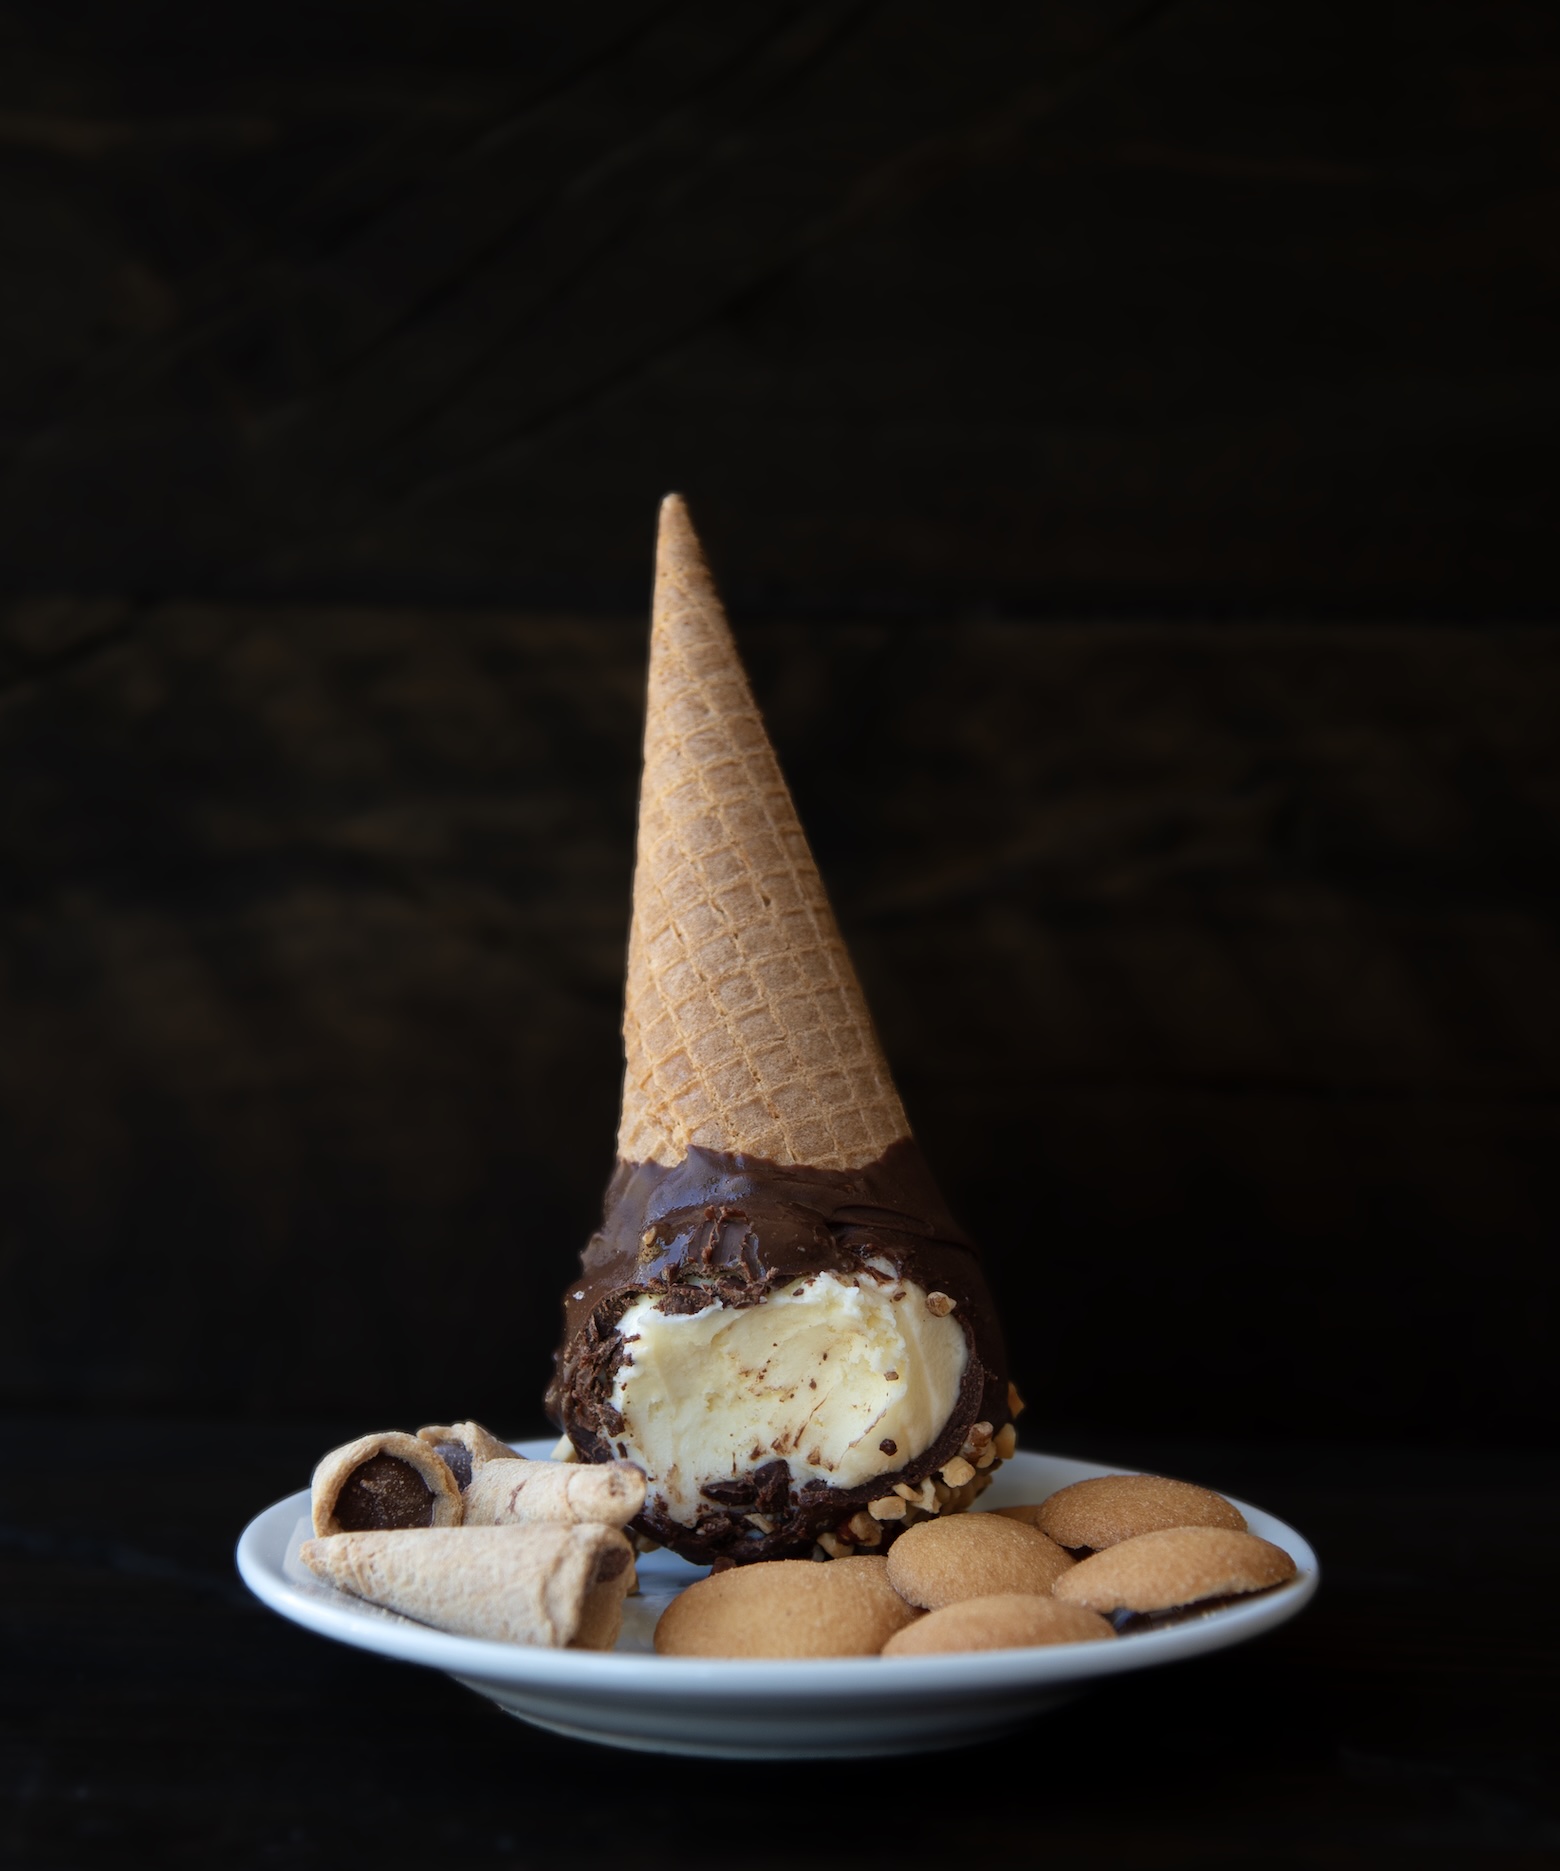
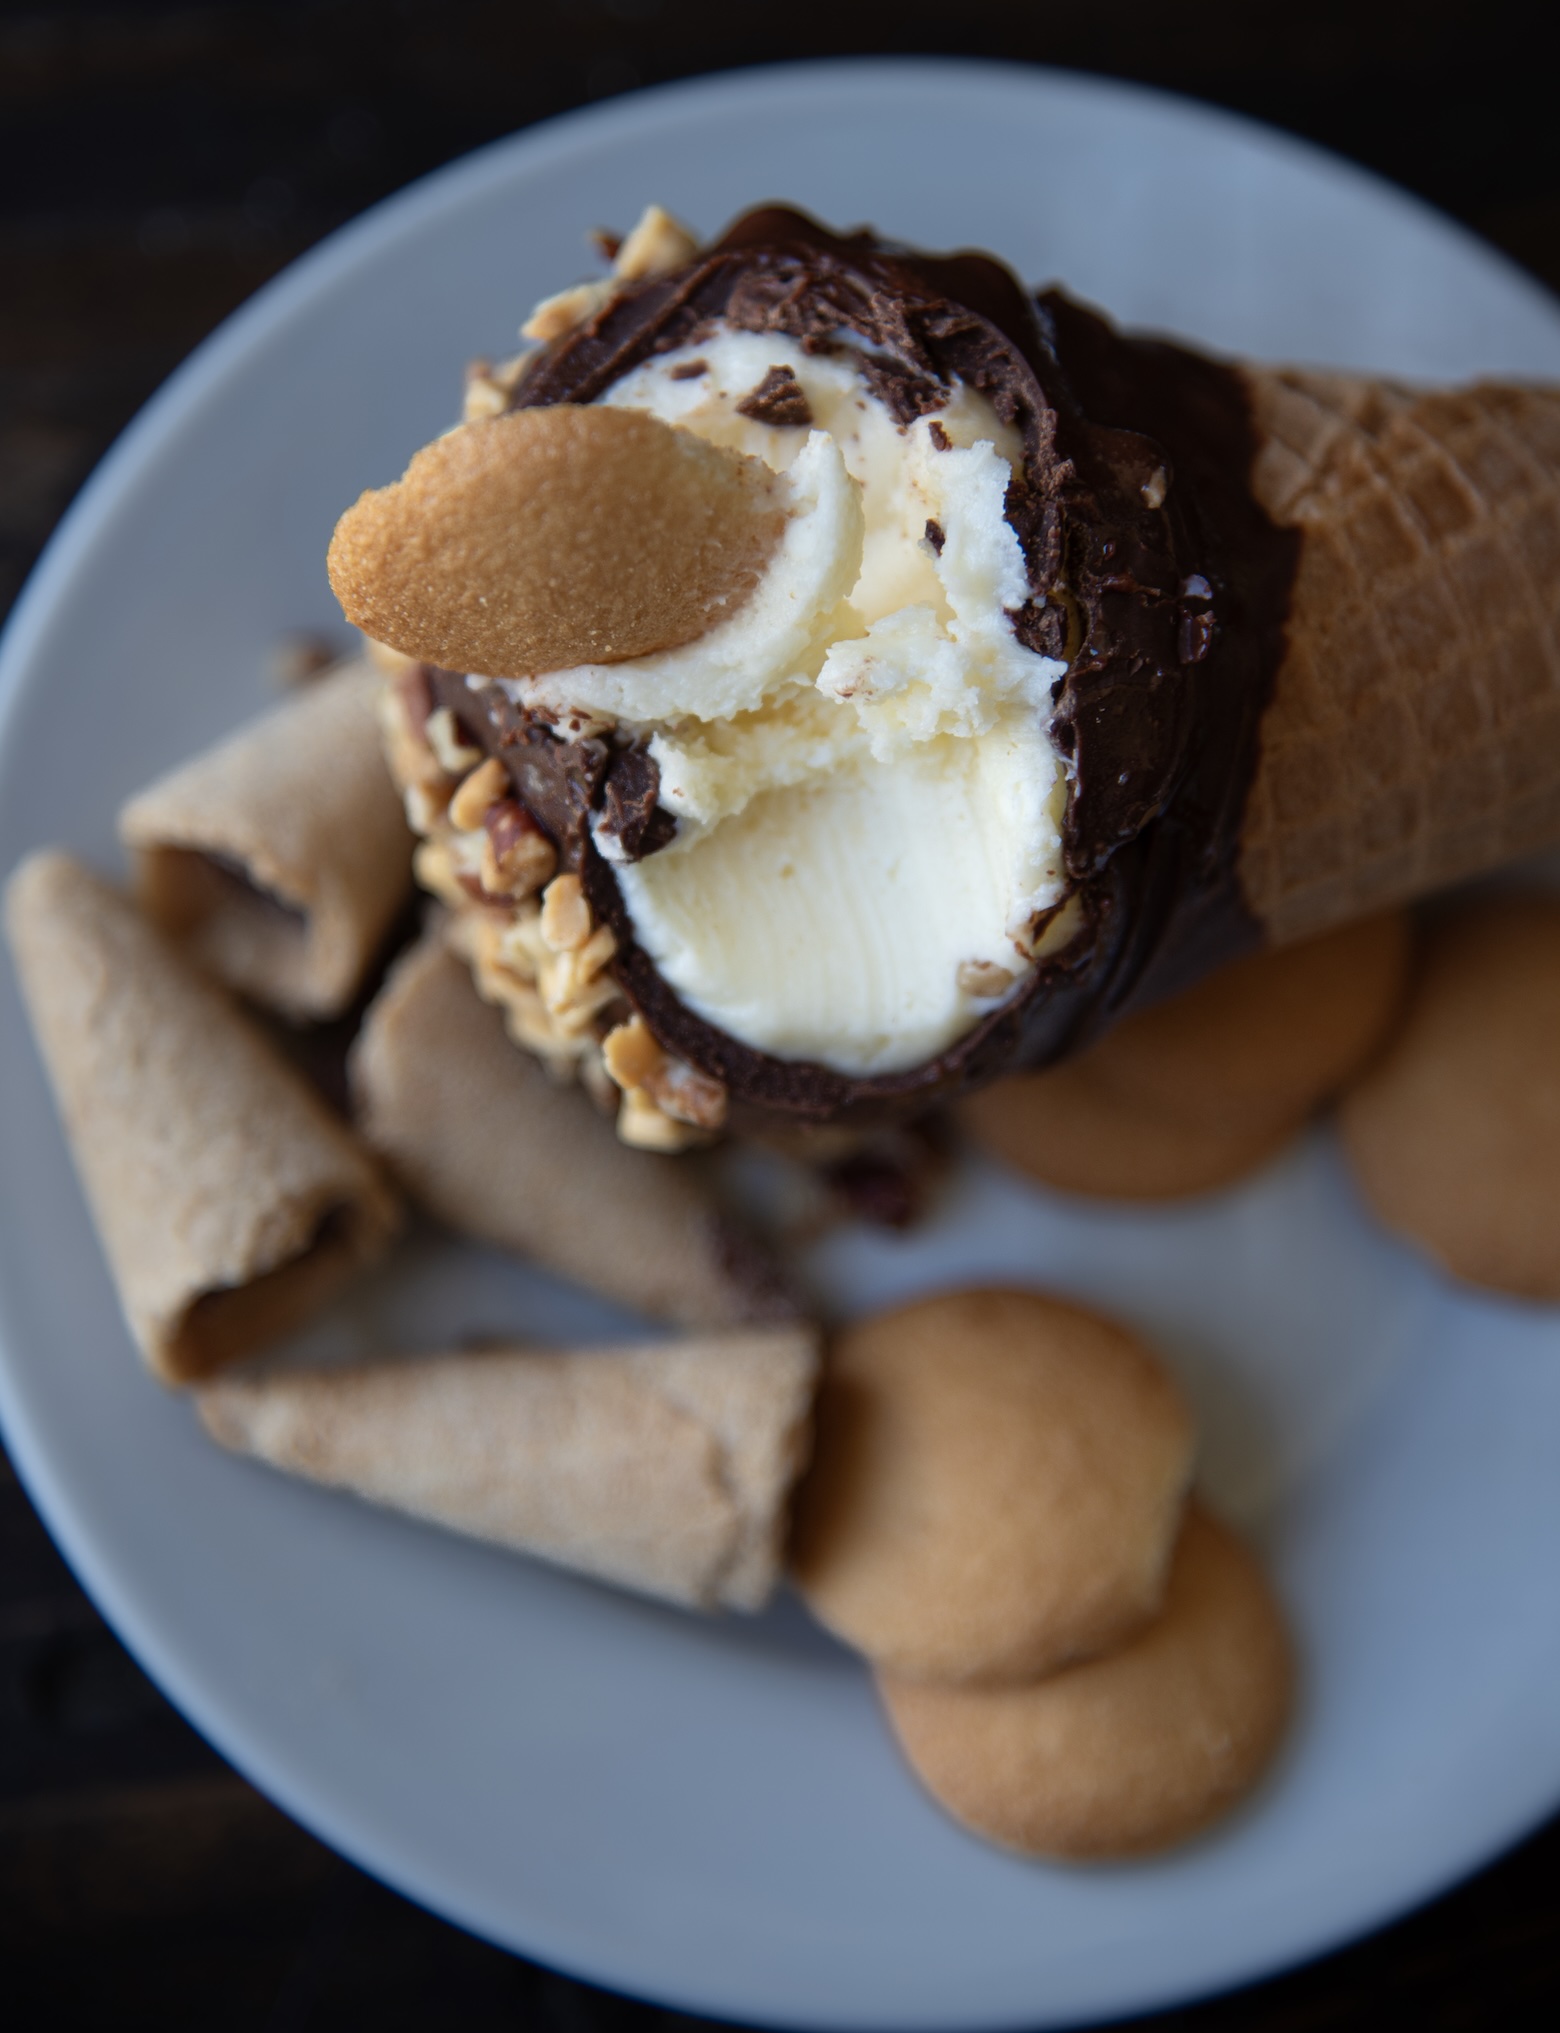
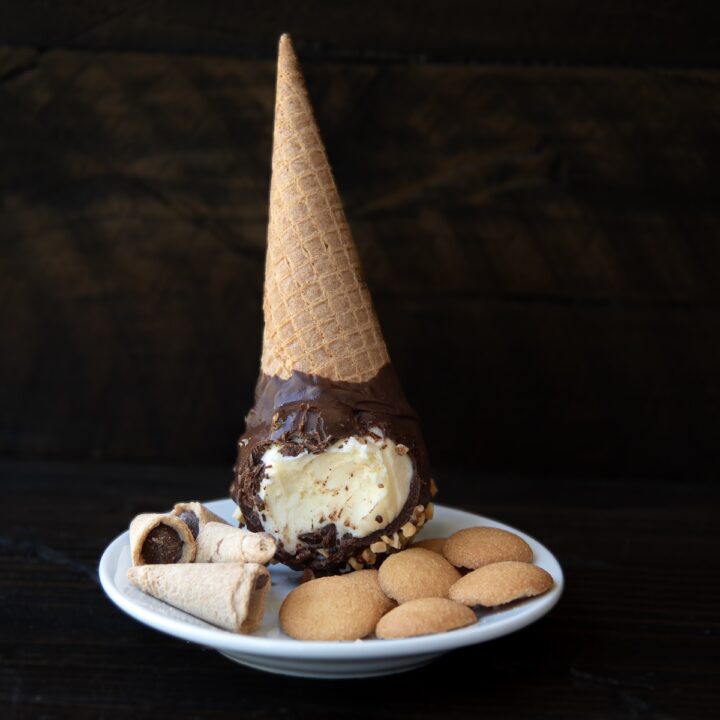
Plate them with broken sugar cones, mini vanilla wafers, Muddy Bites, or your favorite cookies for a playful and interactive dessert board. Whether you’re entertaining guests or just treating yourself, these Drumstick Cheesecake Cheeseballs are a show stopping way to bring joy and flavor to any occasion.

Welcome to this year’s #SummerDessertWeek event hosted by Angie from Big Bear’s Wife. We’ve got 10 spectacular bloggers/ blogs creating some of the best summer desserts this week and sharing the recipes! We will be sharing our recipes on our blogs (some of those recipe links posted in this post) and on social media with the hashtag #SummerDessertWeek
We hope you’ll find some new favorite recipes this week and have fun with us as we celebrate summer!

- Blueberry Peach Pie Parfaits from Big Bear’s Wife
- Watermelon Poke Cake from Semi-Homemade Recipes
- Ice Cream Bread from Jolene’s Recipe Journal
- Strawberry Shortcake Fluff from Cheese Curd In Paradise
- Orange Skillet Cake from A Day in the Life on the Farm
- Easy Key Lime Pie from Blogghetti
- Homemade Drumstick Ice Cream Cones from Karen’s Kitchen Stories
- Pool Party Jello Cups from For the Love of Food
- Drumstick Cheesecake Cheeseball from Sweet ReciPEAs
Want More Cheesecake Cheeseball Recipes?
Cake Batter Cheesecake Cheeseball
Banana Split Cheesecake Cheeseball
Sugar Cookie Cheesecake Cheeseball
Circus Animal Cookie Cheesecake Cheeseball
Angel Food Cake and Strawberry Cheesecake Cheeseball
Drumstick Cheesecake Cheeseball
Ingredients
- For the Cheeseball:
- 8oz. cream cheese, at room temperature
- 1/2 cup unsalted butter, at room temperature
- 1/2 tsp vanilla extract
- 2 cups powdered sugar
- 1 package Dream Whip
- For the Chocolate Coating:
- For the Chocolate Coating:
- 12 ounces semisweet or milk chocolate chips (depends on your preference)
- 3 TBSP vegetable oil (or melted butter or melted Crisco)
- For the Cones:
- 4 sugar cones
- 3/4 cup chopped peanuts
Instructions
- For the Cheeseballs:
- Using a stand mixer with a paddle attachment beat together the cream cheese and the butter until fully incorporated.
- Add the sugar and vanilla extract and beat until fully incorporated.
- Add in the Dream Whip mix and beat until fully combined.
- Lay out four pieces of plastic wrap and using an ice cream scoop, scoop out four the vanilla cream cheese mixture onto each one.
- Do your best to form a ball, then wrap up the ball in the plastic wrap. Do an extra layer of plastic wrap to help it keep its shape.
- Freeze for about 4 hours.
- Prepare the Chocolate Coating:
- Combine chocolate and oil in a medium heat-proof bowl set over a medium saucepan of barely simmering water; stir until melted and smooth.
- Transfer to a small bowl, and let cool about 5-10 minutes. If it's too hot it will melt the cheeseballs.
- Take the cheesecake balls out of the freezer and unwrap.
- Take out four small drinking glasses (to hold the cones upright after dipping).
- Dip the rim of a sugar cone into the chocolate coating. Make sure it really gets on there. Then adhere the cone onto on of the cheesecake cheeseball. Give it about a minute. If it isn't stuck to the cheeseball, dip the cone in the chocolate again and this time when you adhere it to the cheeseball place it in the freezer for about 5 minutes.
- Then dip the whole cheeseball into the chocolate coating.
- Sprinkle with the nuts as quick as possible as the chocolate will set up rather quickly due to the cheeseballs being frozen.
- You can store them in the fridge until ready to eat (they are best eaten day of).
- Serve with pieces of broken sugar cone, mini vanilla wafers, Muddy Bites, cookies of your choice.
Leave a Reply